Lasergame Rabbithunt
Project26 May 2015
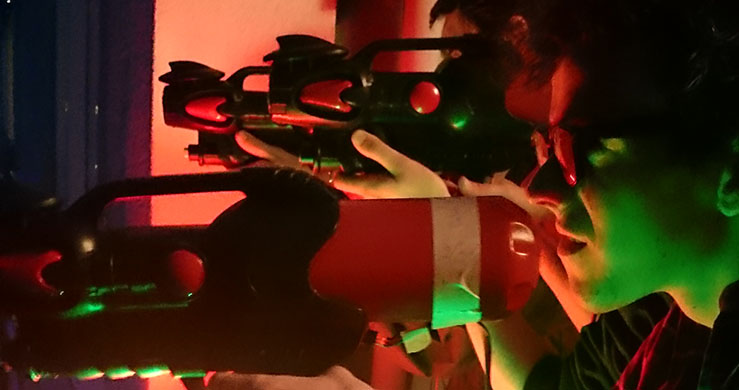
Together with my dorm room we came up with the idea to do a rabbithunt from our balcony. We have a large field behind our house and a balcony with great view of the field. The idea was to have several laser guns on the balcony that can shoot the “rabbits” down below. The “rabbits” are people wearing special vests, once they are shot a display increments the killcount of both the rabbit and the shooter. A price was given to the best shooter and the least shot rabbit.
The guns are what you could describe as highly focused tv remotes, the range turned out to be about 200m. They were controlled by a Arduino mega that was connected to a laptop. The laptop screen displayed the score of each shooter and each rabbit. The rabbit suits consist of four IR receivers, a RGB led, a ATmega328 (the same used on an Arduino Uno) and a NRF24L01+ for the connection to the Arduino mega running the guns.
Base station
The Arduino Mega acts as the base station. There are 3 guns attached to the base station via 3 wires. The guns are modified water pistols. We removed all tubing and pumps and placed a lens inside. Right at the focus point of the lens we placed a high intensity IR LED (SFH 4545, 950 nm, 5 °, 5 mm) to create a bright parallel beam of infrared light. A small pushbutton is placed behind the trigger, when it is pushed it pulls an Arduino pin to ground. This triggers a shot and a signal is send via infrared to where the gun is pointed at.
I kind of hacky edited the IR remote library of Ken Shirriff to enable me to control 3 separate IR leds. The only thing I did was rename all functions and assign a different pin to control. This was the fastest way, maybe not the most elegant, to fix this problem because I had limited time.
There is also a NRF24L01+ chip attached to the Arduino Mega. The Mega is a cheap Chinese version and it doesn’ t provide proper 3.3v (I found out about this after a lot of trial and error). So I attached a separate Arduino Uno to supply the 3.3v to the RF chip. When data is received it is directly forwarded to the serial port. Also if serial data is received it is directly forwarded to the RF chip.
The only exceptions on this is when a D or an E is received from the serial connection, these disable and enable the triggers of the guns to make fair matches possible. Also the Mega checks when receiving a message from the rabbits which gun has hit the rabbit. There is an ledstrip attached to the Mega that is divided in 3 sections. When a gun is triggered, the partition belonging to that gun becomes red. When the gun hits a rabbit the partition becomes green. The electronics of the Base station and guns are fairly simple and most of it is done on a breadboard taped to a table. The electronics inside the guns are soldered. A scematic of the guns and the base station can be seen below.
Rabbit
The core of the rabbit is a homemade printplate. The schematics can be seen below. The brains of the rabbit printplate is a ATmega328. The chip is powered by a 9v battery with a 7805 regulator. There is also a LD33v regulator on board to power the NRF24L01+. There are also four IR recievers and a RGB led connected to the chip.
If one of the IR sensors receives a remote code this code including the rabbit code is transmitted to the base station. The color of the RGB LED then changes from blue to red to indicate a hit. Score display
The score display is actually a small processing sketch. It receives the serial data from the Base station and increments the counters of the rabbits and guns. It also provides control to disable and enable the guns via the keyboard. Besides this it enables a special gamemode called “randommode”. In this gamemode all lights of the rabbits turn off and one of the rabbits turns green. You can only shoot the green rabbit. When this rabbit is shot another rabbits becomes green, and so on. From the reactions of the players this was the most fun gamemode.